Hiển thị các bài đăng có nhãn Blogger. Hiển thị tất cả bài đăng

Thứ Bảy, 31 tháng 12, 2016

Share Code Bắn Pháo Hoa Trang Trí WebSite/Blog Tết

Xin chào, tranh thủ những ngày cuối năm - bài viết này mình sẽ hướng dẫn bạn trang trí blog/website nhân dịp tết 2017. Code Pháo Hoa Trang Trí Website Blog


Demo Online Tại Bài Viết Này

Hướng Dẫn :

Các bạn coppy code phía dưới - dán tất cả vào trước thẻ </head>. Lưu Lại! Xong :D

<script type="text/javascript">
// <![CDATA[
var bits=80;
var speed=40; // Tốc độ như thế nào, càng nhỏ càng nhanh
var bangs=10; // Số pháo hoa có thể xuất hiện cùng lúc (Nhiều quá sẽ có thể gây lag cho trình duyệt)
var colours=new Array("#03f", "#f03", "#0e0", "#93f", "#0cf", "#f93", "#f0c");
// Xanh Đỏ Xanh lá Tía Xanh cyan Cam Hồng
var bangheight=new Array();
var intensity=new Array();
var colour=new Array();
var Xpos=new Array();
var Ypos=new Array();
var dX=new Array();
var dY=new Array();
var stars=new Array();
var decay=new Array();
var swide=800;
var shigh=600;
var boddie;
window.onload=function() { if (document.getElementById) {
var i;
boddie=document.createElement("div");
boddie.style.position="fixed";
boddie.style.top="0px";
boddie.style.left="0px";
boddie.style.overflow="visible";
boddie.style.width="1px";
boddie.style.height="1px";
boddie.style.backgroundColor="transparent";
document.body.appendChild(boddie);
set_width();
for (i=0; i<bangs; i++) {
write_fire(i);
launch(i);
setInterval('stepthrough('+i+')', speed);
}
}}
function write_fire(N) {
var i, rlef, rdow;
stars[N+'r']=createDiv('|', 12);
boddie.appendChild(stars[N+'r']);
for (i=bits*N; i<bits+bits*N; i++) {
stars[i]=createDiv('*', 13);
boddie.appendChild(stars[i]);
}
}
function createDiv(char, size) {
var div=document.createElement("div");
div.style.font=size+"px monospace";
div.style.position="absolute";
div.style.backgroundColor="transparent";
div.appendChild(document.createTextNode(char));
return (div);
}
function launch(N) {
colour[N]=Math.floor(Math.random()*colours.length);
Xpos[N+"r"]=swide*0.5;
Ypos[N+"r"]=shigh-5;
bangheight[N]=Math.round((0.5+Math.random())*shigh*0.4);
dX[N+"r"]=(Math.random()-0.5)*swide/bangheight[N];
if (dX[N+"r"]>1.25) stars[N+"r"].firstChild.nodeValue="/";
else if (dX[N+"r"]<-1.25) stars[N+"r"].firstChild.nodeValue="\\";
else stars[N+"r"].firstChild.nodeValue="|";
stars[N+"r"].style.color=colours[colour[N]];
}
function bang(N) {
var i, Z, A=0;
for (i=bits*N; i<bits+bits*N; i++) {
Z=stars[i].style;
Z.left=Xpos[i]+"px";
Z.top=Ypos[i]+"px";
if (decay[i]) decay[i]--;
else A++;
if (decay[i]==15) Z.fontSize="7px";
else if (decay[i]==7) Z.fontSize="2px";
else if (decay[i]==1) Z.visibility="hidden";
Xpos[i]+=dX[i];
Ypos[i]+=(dY[i]+=1.25/intensity[N]);
}
if (A!=bits) setTimeout("bang("+N+")", speed);
}
function stepthrough(N) {
var i, M, Z;
var oldx=Xpos[N+"r"];
var oldy=Ypos[N+"r"];
Xpos[N+"r"]+=dX[N+"r"];
Ypos[N+"r"]-=4;
if (Ypos[N+"r"]<bangheight[N]) {
M=Math.floor(Math.random()*3*colours.length);
intensity[N]=5+Math.random()*4;
for (i=N*bits; i<bits+bits*N; i++) {
Xpos[i]=Xpos[N+"r"];
Ypos[i]=Ypos[N+"r"];
dY[i]=(Math.random()-0.5)*intensity[N];
dX[i]=(Math.random()-0.5)*(intensity[N]-Math.abs(dY[i]))*1.25;
decay[i]=16+Math.floor(Math.random()*16);
Z=stars[i];
if (M<colours.length) Z.style.color=colours[i%2?colour[N]:M];
else if (M<2*colours.length) Z.style.color=colours[colour[N]];
else Z.style.color=colours[i%colours.length];
Z.style.fontSize="13px";
Z.style.visibility="visible";
}
bang(N);
launch(N);
}
stars[N+"r"].style.left=oldx+"px";
stars[N+"r"].style.top=oldy+"px";
}
window.onresize=set_width;
function set_width() {
var sw_min=999999;
var sh_min=999999;
if (document.documentElement && document.documentElement.clientWidth) {
if (document.documentElement.clientWidth>0) sw_min=document.documentElement.clientWidth;
if (document.documentElement.clientHeight>0) sh_min=document.documentElement.clientHeight;
}
if (typeof(self.innerWidth)!="undefined" && self.innerWidth) {
if (self.innerWidth>0 && self.innerWidth<sw_min) sw_min=self.innerWidth;
if (self.innerHeight>0 && self.innerHeight<sh_min) sh_min=self.innerHeight;
}
if (document.body.clientWidth) {
if (document.body.clientWidth>0 && document.body.clientWidth<sw_min) sw_min=document.body.clientWidth;
if (document.body.clientHeight>0 && document.body.clientHeight<sh_min) sh_min=document.body.clientHeight;
}
if (sw_min==999999 || sh_min==999999) {
sw_min=800;
sh_min=600;
}
swide=sw_min;
shigh=sh_min;
}
// ]]>
</script>
Chúc bạn thành công!

Thứ Hai, 26 tháng 12, 2016

Thêm bài viết liên quan bằng Google Custom Search Engine

Thêm bài viết liên quan cho Blogspot bằng Google Custom Search Engine.
Chào các bạn,
Như các bạn thường thấy, sau mỗi bài viết trên các Blog hay website chúng ta thường sẽ thấy một danh sách các bài viết liên quan. Và chúng ta cũng có khá nhiều cách để thêm bài viết liên quan cho Blogspot.
Tuy nhiên, hôm nay mình sẽ chia sẻ tới các bạn một cách khá hay nữa đó là dùng công cụ Google Custom Search Engine.

Các bước thực hiện

Bước 1: Đăng nhập vào gmail và truy cập vào địa chỉ sau: cse.google.com
Bước 2: Click vào Tạo công cụ tìm kiếm tùy chỉnh.

Bước 3: Các bạn điền tên địa chỉ web của mình vào phần Trang web để tìm kiếm. Nếu có nhiều hơn 1 tên miền thì cứ điền mỗi tên miền vào 1 dòng là được. Sau đó là chọn tên cho công cụ tìm kiếm, cái này thì nó tự động rồi, nhưng nếu bạn muốn sửa lại thì cũng không sao. Sau khi nhập xong thì click vào Tạo.
Bước 4: Click vào Nhận mã.
Bước 5: Bây giờ, các bạn sẽ nhận được một đoạn mã tương tự như sau:
Các bạn hãy chú ý đến đoạn chữ mà mình đã bôi vàng '011635554619310511016:er_vk4k6eim'
Bước 6: Bây giờ, các bạn hãy copy dòng trên và thay vào phần xxxxxxxxxxx đoạn code dưới đây.
<div class="quan-tam">
<h3 class="heading">Bạn nên xem</h3>
<div id='cse-search-form' style='width: 100%;height:300px;overflow-y: scroll;'>Đang tải...</div>
<script src='http://www.google.com/jsapi' type='text/javascript'></script>
<script type='text/javascript'>
google.load('search', '1', {language: 'vi'});
google.setOnLoadCallback(function() {
var customSearchControl = new google.search.CustomSearchControl("xxxxxxxxxxx");
customSearchControl.setResultSetSize(google.search .Search.FILTERED_CSE_RESULTSET);
customSearchControl.draw('cse-search-form');
customSearchControl.execute("yyyyyyyyyyy");
}, true);
</script>
</div>
Bước 7: Các bạn tiếp tục thay phần yyyyyyyyyyy thành <data:blog.title/>. Sau đó copy đoạn code đã hoàn thiện và dán vào vị trí muốn hiển thị. Ví dụ dưới đây là đoạn code đã hoàn thiện của mình:
<div class="quan-tam">
<h3 class="heading">Bạn nên xem</h3>
<div id='cse-search-form' style='width: 100%;height:300px;overflow-y: scroll;'>Đang tải...</div>
<script src='http://www.google.com/jsapi' type='text/javascript'></script>
<script type='text/javascript'>
google.load('search', '1', {language: 'vi'});
google.setOnLoadCallback(function() {
var customSearchControl = new google.search.CustomSearchControl("011635554619310511016:er_vk4k6eim");
customSearchControl.setResultSetSize(google.search .Search.FILTERED_CSE_RESULTSET);
customSearchControl.draw('cse-search-form');
customSearchControl.execute("<data:blog.title/>");
}, true);
</script>
</div>
Bước 8: Các bạn chèn đoạn CSS sau vào blog cho đẹp xíu nhé 🙂
.quan-tam{height:346px;margin-bottom:20px;border:1px solid #e6e6e6}
.quan-tam h3.heading{font-size:24px;margin-bottom:0}
.quan-tam table td,table th{border-width:0;padding:5px 10px}
.quan-tam .gsc-webResult .gsc-result{padding:0!important}
.quan-tam .gsc-cursor{width:100%;text-align:center;float:left;font-size:20px;margin-top:15px}
.quan-tam .gs-result .gs-title,.quan-tam .gs-result .gs-title *{text-decoration:none!important;color:#FF9800!important}
.quan-tam .gs-result .gs-title a{text-decoration:none!important;color:#FF9800!important}
.quan-tam .gs-result a.gs-visibleUrl,.quan-tam .gs-result .gs-visibleUrl{font-weight:700}
.quan-tam .gs-bidi-start-align.gs-snippet{line-height:20px;margin:5px 0 0}
.quan-tam .gsc-results.gsc-webResult{width:100%}
.quan-tam .gsc-search-box,.quan-tam .gsc-above-wrapper-area,.quan-tam .gsc-resultsHeader,.quan-tam .gcsc-branding{display:none}
Lời Kết : Như vậy là mình đã hướng dẫn các bạn cách thêm bài viết liên quan cho Blogspot bằng Google Custom Search Engine rồi. Với cách này, nó sẽ lấy tên bài viết của các bạn làm từ khóa tìm kiếm và sau đó đưa ra các bài viết có tựa đề tương tự hoặc có chứa các từ khóa trong tên bài viết của bạn.
Theo Đôi Guốc Mộc Blog

Thứ Bảy, 26 tháng 11, 2016

Chia Sẻ Template Blog Vũ Tiến Anh Bản V1

Xin Chào, Hôm nay mình sẽ share bản template của blog VuTienAnh bản hiện tại :D. Demo Như Dưới Ảnh.


Demo : Trang Chủ Trên Pc 
Trang Chủ Trên Điện Thoại
Bài Viết : 
Chuyên Mục : Trên Pc
Trên Điện Thoại


Còn Lại Tự Tìm Hiểu :)
- Template Responsive
- Boostrap Khoảng 60%
- Tốc Độ load khá ổn 
- Về Seo Thì Mình không dám chắc :D (Gà việc này) :D

Dowload Template Ở Phía Dưới

=========Hướng Dẫn Cài Tiếp Các Tiện Ích========
1.Tiện Ích Theo Dõi Blog
<div class="lightsosmed-img">
<img alt="tu-hoc-seo-online" class="img-responsive" height="180" src="https://img1.steemit.com/0x0/http://www.skipprichard.com/wp-content/uploads/2013/01/iStock_000012933486Small-583x343.jpg" title="Blogspot VN" width="300" />
<div class="aboutfloat-img"><span class="lightsosmed-float"><a href="https://www.blogger.com/follow-blog.g?blogID=
1730051984977787828" rel="nofollow" target="_blank" title="Theo dõi"><i class="fa fa-heart"></i> THEO DÕI</a></span></div>
</div>
Thay ID 1730051984977787828 Thành ID của Blog Bạn.
2. Nhận Xét Mới 
<div class='widget-content'>
<style type="text/css">
ul.blmoi a{font-weight:400;}
ul.blmoi{padding:0;list-style:none}
ul.blmoi li{margin-bottom:10px;border-bottom:1px dashed #d2d2d2;padding-bottom:10px}
</style>
<script>
//<![CDATA[
var sl_nhanxet = 5,
kt_nhanxet = 25;
function nhanxetmoi(json){var entry,commurl,commsum;document.write('<ul class="blmoi">');for(var i=0;i<sl_nhanxet;i++){entry=json.feed.entry[i];if(i==json.feed.entry.length)break;for(var k=0;k<entry.link.length;k++){if(entry.link[k].rel=='alternate'){commurl=entry.link[k].href;break;}}
commsum=("content"in entry)?entry.content.$t:("summary"in entry)?entry.summary.$t:"";commsum=commsum.replace(/<.*?>/g,"");if(commsum.length>kt_nhanxet)commsum=commsum.substring(0,kt_nhanxet)+"...";document.write('<li><strong><a rel="nofollow" href="'+commurl+'">'+entry.author[0].name.$t+':</a></strong> <span>'+commsum+'</span></li>');}
document.write('</ul>');}
//]]></script>
<script src='/feeds/comments/summary?alt=json-in-script&amp;callback=nhanxetmoi'></script>
</div>
3. Nút Demo Và Dowload
<div id="wrap"> <a class="btn down" href="http://blogvutienanh.blogspot.com/" rel="nofollow" target="_blank">Demo <i class="fa fa-paper-plane"></i></a><br /> 
<a class="btn down" href="http://vutienanh.pro" rel="nofollow" target="_blank">Dowload <i class="fa fa-file"></i></a>
</div>
Update Bổ Sung Sau :) :3.

Lời Kết: Template Này Mình Lấy Ý Tưỏng Từ Anh Đồng Việt (DongViet.Net) Do Là Lần Đầu Làm Template Cho Blogger Sẽ Không Được Hoàn Hảo. Mọi Người sử Dụng Nếu Có Lỗi Gì Hãy Comment Phía Dưới Mình Sẻ Giải Đáp. 
Theo Vũ Tiến Anh Blog - VuTienAnh.Pro

Thứ Hai, 14 tháng 11, 2016

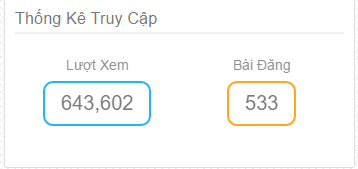
Hướng Dẫn Tạo Tiện Ích Thống Kê Blog Đơn Giản Đẹp

Như các bạn đã biết Blogger hỗ trợ 1 Widget giúp thống kê cho blog hiển thị số lượt truy cập vào Blog. Nhưng mặc định của nó không được đẹp. Nên hôm nay mình sẽ chia sẽ 1 mẫu Thống kê cho Blog được tùy biến lại so với bản gốc của Blogger.
Mẫu này thì mình tách từ một template khác :D các bạn mang về có thể chỉnh sửa lại cho ưng ý. Giờ thì bắt tay vào làm thôi nhỉ :D.
Hướng Dẫn :
Bước 1: Các bạn đăng nhập vào Blog của các bạn => Bố cục
Bước 2: Chọn Thêm Tiện ích => Thống kê blog => Chọn kiểu thứ 2 (như hình dưới) rồi Lưu
Lưu ý: Các bạn để ý vào link của Widget các bạn vừa tạo và nhớ cái ID sau cùng của dòng link. Thường thì mặc định của Widget này là Stats1.
Bước 3: Các bạn chọn Mẫu => Chỉnh sửa HTML => Chọn đến tiện ích lúc nãy các bạn vừa thêm, như của mình là Stats1


Lúc này các bạn sẽ thấy 1 đoạn code:
  <b:widget id='Stats1' locked='false' title='Tổng số lượt xem trang' type='Stats' visible='true'>
<b:includable id='main'>
<b:if cond='data:title != &quot;&quot;'><h2><data:title/></h2></b:if>
<div class='widget-content'>
<!-- Content is going to be visible when data will be fetched from server. -->
<div expr:id='data:widget.instanceId + &quot;_content&quot;' style='display: none;'>
<!-- Counter and image will be injected later via AJAX call. -->
<b:if cond='data:showSparkline'>
<img alt='Sparkline' expr:id='data:widget.instanceId + &quot;_sparkline&quot;' height='30' width='75'/>
</b:if>
<span expr:class='&quot;counter-wrapper &quot; + (data:showGraphicalCounter ? &quot;graph-counter-wrapper&quot; : &quot;text-counter-wrapper&quot;)' expr:id='data:widget.instanceId + &quot;_totalCount&quot;'>
</span>
<b:include name='quickedit'/>
</div>
</div>
</b:includable>
</b:widget>
Bước 4: Các bạn thay đoạn code bên trên bằng đoạn code phía dưới:

  
<b:widget id='Stats1' locked='false' mobile='yes' title='Thống Kê Truy Cập' type='Stats' version='1' visible='true'>
<b:includable id='main'>
<b:if cond='data:title != &quot;&quot;'><h2><data:title/></h2></b:if>
<div class='widget-content'>
<!-- Content is going to be visible when data will be fetched from server. -->
<div expr:id='data:widget.instanceId + &quot;_content&quot;' style='display: none;'>
<b:if cond='data:showAnimatedCounter and data:showSparkline'><div class='stats-overlay'/></b:if>
<b:if cond='data:showSparkline'>
<img alt='Sparkline' class='sts-chart img-responsive' expr:id='data:widget.instanceId + &quot;_sparkline&quot;'/>
</b:if>
<div class='stats-container'><label><b:with value='&quot;pageViews&quot;' var='translateLan'><b:include name='translateLan'/></b:with></label><div expr:class='&quot;counter-wrapper &quot; + (data:showGraphicalCounter ? &quot;mat-counter graph-counter-wrapper&quot; : &quot;text-counter-wrapper&quot;)' expr:id='data:widget.instanceId + &quot;_totalCount&quot;'/></div>
</div>
<div class='stats-container'><label><b:with value='&quot;postsNumber&quot;' var='translateLan'><b:include name='translateLan'/></b:with></label><div expr:class='(data:showGraphicalCounter ? &quot;mat-counter &quot; : &quot;&quot;) + &quot;total-posts-counter&quot;'/></div>
<script>
function totalPosts(json){$(&quot;.total-posts-counter&quot;).append(json.feed.openSearch$totalResults.$t);};
$( document ).ready(function() {
var sTP = document.createElement(&quot;script&quot;);
sTP.type = &quot;text/javascript&quot;;
sTP.src = &quot;/feeds/posts/default?alt=json-in-script&amp;max-results=0&amp;callback=totalPosts&quot;;
$(&quot;head&quot;).append(sTP);
});
</script>

<!-- <b:include name='quickedit'/>-->
</div>
</b:includable>
<b:includable id='translateLan'>
<b:with value='{&quot;af&quot;, &quot;de&quot;, &quot;am&quot;, &quot;ar&quot;, &quot;bn&quot;, &quot;kn&quot;, &quot;zh_HK&quot;, &quot;zh_CN&quot;, &quot;zh_TW&quot;, &quot;es&quot;, &quot;es_419&quot;, &quot;fil&quot;, &quot;fr_CA&quot;, &quot;fr&quot;, &quot;el&quot;, &quot;gu&quot;, &quot;hi&quot;, &quot;id&quot;, &quot;en&quot;, &quot;en_GB&quot;, &quot;it&quot;, &quot;ja&quot;, &quot;ml&quot;, &quot;ms&quot;, &quot;mr&quot;, &quot;or&quot;, &quot;pt_BR&quot;, &quot;pt_PT&quot;, &quot;ru&quot;, &quot;ta&quot;, &quot;te&quot;, &quot;ur&quot;}' var='langsAvailable'>
<b:if cond='data:langsAvailable any (language =&gt; language == data:blog.locale )'>
<b:with value='{0,1,2,3,4,5,6,7,8,9,10,11,12,13,14,15,16,17,18,19,20,21,22,23,24,25,26,27,28,29,30,31}' var='langNum'>
<b:with value='{&quot;Bladkyke&quot;, &quot;Seitenaufrufe&quot;, &quot;የገጽ ዕይታዎች&quot;, &quot;المشاركات&quot;, &quot;পৃষ্ঠাদর্শন&quot;, &quot;ಪುಟವೀಕ್ಷಣೆಗಳು&quot;, &quot;網頁檢視次數&quot;, &quot;网页浏览次数&quot;, &quot;個網頁瀏覽數&quot;, &quot;Páginas vistas&quot;, &quot;Páginas vistas&quot;, &quot;Mga Pageview&quot;, &quot;Pages vues&quot;, &quot;Pages vues&quot;, &quot;Προβολές σελίδας&quot;, &quot;પૃષ્ઠ દૃશ્યો&quot;, &quot;पृष्ठ देखे जाने की संख्या&quot;, &quot;Penayangan&quot;, &quot;Pageviews&quot;, &quot;Pageviews&quot;, &quot;Visualizzazioni di pagine&quot;, &quot;ページビュー&quot;, &quot;പേജ്‌കാഴ്‌ചകള്‍‌&quot;, &quot;Paparan halaman&quot;, &quot;पृष्ठदृश्ये&quot;, &quot;Pageviews&quot;, &quot;Visualizações de página&quot;, &quot;Visualizações de páginas&quot;, &quot;Просмотры страницы&quot;, &quot;பக்கக்காட்சிகள்&quot;, &quot;పేజీ వీక్షణలు&quot;, &quot;صفحہ دیکھے جانے کی تعداد&quot;}' var='totalPageViewsMessage'>
<b:with value='{&quot;Plasings&quot;, &quot;Posts&quot;, &quot;ልጥፎች&quot;, &quot;مرات مشاهدة الصفحة&quot;, &quot;পোস্টগুলি&quot;, &quot;ಪೋಸ್ಟ್‌ಗಳು&quot;, &quot;文章&quot;, &quot;帖子&quot;, &quot;發表文章&quot;, &quot;Entradas&quot;, &quot;Publicaciones&quot;, &quot;Mga Post&quot;, &quot;Messages&quot;, &quot;Articles&quot;, &quot;Αναρτήσεις&quot;, &quot;પોસ્ટ્સ&quot;, &quot;संदेश&quot;, &quot;Pos&quot;, &quot;Posts&quot;, &quot;Posts&quot;, &quot;Post&quot;, &quot;投稿&quot;, &quot;പോസ്റ്റുകള്‍&quot;, &quot;Catatan&quot;, &quot;पोस्ट्स&quot;, &quot;ପୋଷ୍ଟ ସମୂହ&quot;, &quot;Postagens&quot;, &quot;Mensagens&quot;, &quot;Сообщения&quot;, &quot;இடுகைகள்&quot;, &quot;పోస్ట్‌లు&quot;, &quot;اشاعتیں&quot;}' var='totalPostsMessage'>
<b:with value='data:langNum first (x =&gt; data:langsAvailable[x] == data:blog.locale)' var='currentLang'>
<b:if cond='data:currentLang'>
<b:if cond='data:translateLan == &quot;pageViews&quot;'>
<b:eval expr='data:totalPageViewsMessage[data:currentLang]'/>
</b:if>
<b:if cond='data:translateLan == &quot;postsNumber&quot;'>
<b:eval expr='data:totalPostsMessage[data:currentLang]'/>
</b:if>
</b:if>
</b:with>
</b:with>
</b:with>
</b:with>
<b:else/>
<b:if cond='data:translateLan == &quot;pageViews&quot;'>
Lượt Xem
</b:if>
<b:if cond='data:translateLan == &quot;postsNumber&quot;'>
Bài Đăng
</b:if>
</b:if>
</b:with>
</b:includable>
</b:widget>
Bước 5: Các bạn chèn đoạn code phía dưới vào trước và trên thẻ </head> 

<style> .widget.Stats, .Stats{background-color:<data:skin.vars.accentColor/>;color:<data:skin.vars.fallbackTextColor/>;}
.Stats .counter-wrapper, .Stats .total-posts-counter{display: inline-block;opacity: .87;font-size: 20px;border: 2px solid #03A9F4;border-radius: 10px;padding:10px 16px;}
.sts-chart{width:100%;height:120px;}
.stats-container{display: inline-block;float:left;width:50%;background-color: <data:skin.vars.fallbackBackground/>;margin-bottom: 15px;padding: 16px;text-align: center;}
.Stats .total-posts-counter{border: 2px solid #ff9800;}
label{display:block;opacity:.75;font-weight:400;}
.stats-overlay.counted{position: absolute;top: 0;right: 0;width: 100%;height: 120px;background-color: <data:skin.vars.accentColor/>;-webkit-transition: width 3s ease-in; -moz-transition: width 3s ease-in; -o-transition: width 3s ease-in; transition: width 3s ease-in;}
.stats-overlay.counted.animated{width: 0%;}</style>
Bước 6: Lưu lại và xem thành quả
Lời Kết : Chúc các bạn thành công. Nếu có thắc mắc thì Comment bên dưới mình sẽ giải đáp cho các bạn.